Friday, August 23, 2013

Tips For Self Tanning Your Face

Hey,

Summer is coming to an end and well all want to keep that glowing tan we got this summer through the whole winter and that's where self tanner becomes your friend. The self tanner for the face I like is the Lorac SelfTantalizer for face. I find that it give me light glowing color; this product is a gradual self tanner.

When using self tanner on your face you first want to read the instructions and do a patch test on your wrist, this will not only show you if you'll have a reaction but if the product will turn you orange. I generally use the same amount of self tanner as I would moisturizer, don't over do it. Using too much is how you get strikes. Generally all you need is a dime size. I rub the product in between my hands and then all over my face, getting the ears and down the neck. This is important because without these areas it will look really strange and fake. After I cover my face I go over my face with a clean stippling brush. This is very important, it will insure your completely blended in and help get rid of patches that just using your hands could leave. It will also leave you look more naturally tan. Last thing I do is wash my hands, make sure you do this immediately after you finish or you'll end up with tan palms and that's not always a good look.

Other things you should always do before self tanning: apply to freshly cleaned, dry skin. Exfoliate prior to self tanning and slowly build up the color, never apply four coats at one time. I also suggest waiting eight to twelve hours before washing your face again.

Thanks for reading, please leave any request below!

Monday, August 12, 2013

Mani Monday: Keep Calm and Paint On

Hey,

I went to get my nails done today, the color I chose was China Glaze Keep Calm and Paint On. It was part of the Avant Garden collection that was released in the spring. I just had my nails mint but saw this and wanted it on my nails, I was going to buy this one but I couldn't find it, now that I have on my nails I'm glad I didn't, I have Re-Fresh Mint so a shimmer top coat would pretty much make this color so it's not worth it in my opinion. It's a pretty color and my nails are acrylics so the paint won't chip but it will fade. I don't know what the top coat was. The polish isn't so blue in person.

Thanks for reading, leave any request below!

Friday, August 9, 2013

First Impression: Covergirl Flamed Out and Maybelline Big Eyes Mascaras

Hey,

I got the Maybelline Big Eyes mascara a few weeks ago and earlier this week Covergirls Flamed Out mascara earlier this week. I wanted to share by first impressions on these mascaras but felt it wasn't enough for one post so I figured I'd combine them and then tell you which one I'd suggest.
 
Let's start with the Maybelline Big Eyes mascara. What's really cool about this mascara is that it has a separate mascara for the lower lashes, which is a nice mascara. But with that said the mascara for you upper lashes doesn't do anything, I tried this and so did my mother and neither of us felt like it did anything. It's like putting nothing on your lashes and no matter how much you work with it is barely shows up. To me it's not even a natural look it just looks like you have nothing on, this isn't what I kook for in a mascara at all, I have fairly nice lashes and this doesn't do anything to them other then tints them, so no matter your lashes I'd say skip on this, it does nothing at all. It's quite the let down for Maybelline mascaras. I honestly couldn't even tell you how this weird since I can't see it to say if it's still on in a few hours. The brush on the top lash mascara is thin, it tapered to the tip and has a twist in the brush. The lower lashes mascara I'd just small and straight nothing special, your typical wand for the lower lashes.
 
The Covergirl Flamed Out mascara on the other hand is nice, it gives a natural look but it is still really nice. It wears great, I actually fell asleep with this on and it looked the same as it did before I fell asleep, I have experienced no flaking. It doesn't make your lashes hard and it holds a curl. This does need to be built up if you want to have more then a natural look but two coats looks nice too. The brush is a bit different, it's smaller in the middle and the tip and base seem to be the same size, the brush is really good and this mascara doesn't leave clumps.
 
Both of these mascaras are around the same price and where one can be bought the other one should be able to be bought there too. The Covergirl mascara is the one I would suggest, skip on the Maybelline mascara it really doesn't do anything.
 
Have you tried either of these, what are your thoughts on them?
 
Thanks for reading, leave any request below!

Wednesday, August 7, 2013

Haul; Mostly Highend Makeup

Hey,

Lately I have done a bit of shopping, I made an order from Mac, Sephora, and Urban Decay. I also picked up a few things from Wal Mart. Starting with Mac I just got two eye shadows in Gesso and Antiqued. Gesso is a matte white and Antiqued is a shimmer bronze shade,


Then I ordered from Urban Decay, when I order from a brands site instead of Sephora I only buy items that are either on sale or exclusively sold on their site. The three items I got are on sale and should still be on the site. I got two cream blushers in Greedy which sheers out to be a nice berry and Quickie which gives the most beautiful pinkish peach glow. I also got the Deluxe Shadow palette.


From Sephora I bought a Stila Lip Glaze Trio, the colors are Peach Blossom, Pink Orchid, and Lilac. I also got the Becca Beach Tint Duo, this is a brand I haven't seen or heard much about or even tried till now, I really like these though they are really pigmented and gorgeous colors. It's one of those products that a little goes a long way. The colors are Watermelon and Fig, Fig is nude and Watermelon is mid tone pink.


The next thing I got was the Stila Trio in Warm, I love Stila eyes shadow and these are such a great deal, the colors are Brulee, Sorbet and Truffle. Brulee is a matte cream, Sorbet is a shimmery peach and Truffle is a bronze shade. All of these are on the light side but can give enough dimension without having to add in more colors.


 In my opinion the most exciting thing I bought in this haul the Nars And God Created the Women, this is my first Nars product and this palette is absolutely gorgeous, it is very small but still very nice. The colors in this palette are Alhambra, Bellisima, Kalahari, Galapagos, Coconut Grove, and Night Clubbing


 From Wal Mart I got a Covergirl Lip Perfection Jumbo Gloss Balm in Watermelon Twist, I'm a little late on picking one of these up as usual. I got another Maybelline Color Tattoo this one is in Inked Pink, this looks so beautiful with Scratch from the previously mentioned Urban Decay palette. Lastly I bought another Covergirl product I got the Flamed Out mascara in Very Black Blaze this one is also water resistant, I'm going to review this in a week or two.


Have you tried any of these?

Thanks for reading, leave any request below!

Friday, August 2, 2013

NOTD: Going Green

with flash
Hey,

I have been very bad with posting, I started a new job and have been working 50 hour weeks and therefore I haven't had much time to write up a post and then post it. But I am going to work on that starting now! This week I went with China Glaze Re-Fresh Mint and Four Leaf Clover. Both gorgeous shades of green and great polishes. I used Four Leaf Clover as my accent nail and then the mint on the rest of my nails.  Both these polishes last long on the nails and they really compliment each other. I used no top coat or base coat. Four Leaf Clover is very staining on the nails, in my experience using a base coat makes no difference with preventing stains from this polish.

without flash
Thanks for reading, leave any request below!


Thursday, August 1, 2013

August Shopping List

Hey,
Can you believe it's already August!? Summer has gone by so fast! So for anyone confused by the title of this post let me explain. I have decided to start a new monthly post where I share my list of things I want to pick up in the month, from high end to drugstore, things from skin care, nail polish, perfume and makeup, possibly even hair! Exciting! Then at the end of the month do a haul on everything that I picked up that was on the list. Now I wont just do one big monthly haul nor will I only buy things on the list, I will have more then one haul a month but this will ensure at least two because I have decided to spilt this up into two separate hauls, nail polish and everything else, reason being not everyone is a polish junkie like myself, and polish can be quite long and I do hoard it so it will just be easier to have a separate haul on it, with that said unlike the monthly haul for all other items on the list, which polish will have its separate list in this post; the polish hauls will be more then just the list but hopefully the list will help minimize the amount of polish I hoard! I have seen a few other bloggers do this before and I just loved the idea so lets jump right into the products. Before getting into this I'm going to explain my list a bit better, it's spilt between beauty and nails, in the beauty there is high end and drugstore, within that it will be sub categorized in sets, face, lips, eyes and other. If there is a lot of products from one brand instead of typing each time the brand I will sub categorize it into that brand. Sets will be the only thing with links.
 
Beauty:
High end:
Sets:
Super Star Beauty Essentials set (Sephora) 
Sephora Favorites Lash Stash To Go
Josie Maran Argan Lip and Cheek Color Stick set
Face:
Urban Decay Naked Flushed
Benefit Gettin' Cheeky
Lorac TANtalizer Highlighter and Matte Bronzer Duo
Eyes:
Mac Eyeshadow in All That Glitters and Swiss Chocolate
Sephora Collection Color Token eye shadow in Gold Casino
Lips:
MAC Tinted Lipglass in Pink Lemonade
Buxom Big and Healthy Lip Cream in Creamsicle and White Russian
MAC Lipstick in Please Me
Other:
Lady Gaga Fame Perfume
 
Drugstore:
Rimmel: I know a lot of Rimmel, but it's my favorite drugstore brand
Lipsticks: Lasting Finish Lipsticks in: 15,11,10 (Kate Moss Line) Did they do away with the normal line of these, I don't see them on their site?
Face: BB Cream, Natural Bronzer and Wake Me up Concealer
Eyes: ScandalEyes Shadow Sticks in Bad Girl Bronze and Tempting Turquoise
Physicians Formula Matte Collection Quads in Classic Nudes and Cayon Classics
Revlon Super Lustrous lipsticks in Cherry Blossom and Cherries in the Snow
L'oreal Colour Caresse Wet Shine Stain in Berry Persistant and Endless Red
Maybelline Eye Studio Color Plus Silk Eye Shadow Quads in Copper Chic
Nails:
China Glaze:
Sea Spray, Aztec Orange, Kinetic Candy, Aqua Baby, Flip Flop Fantasy, Kiwi Cool-Ada, Solar Power
Other Brands:
OPI It's a Grape Fit
Sally Hansen Lustre Shine Nail Color in Firefly and Hard as Nails Xtreme Wear in Crushed and Breeze Blue

Please note this is a lot of stuff but I probably won't end up buying all of this its just a list of definite things to pick up this month some I may not come across or end up not picking up for other reasons nor will I buy all of this at one time!

What's on your August shopping list? Any of these you'd suggest skipping on?

Thanks for reading, please leave any request below!

Monday, July 15, 2013

Mani Monday: Tart-y for the Party

Hey,

This blog is up a little late today but at least I got one up this week, I started a new job and have been working a lot so I haven't had time to get a Mani Monday post up, but I'm going to start getting these back up. This week I used China Glaze Tart-y for the Party, the name is perfect for this post! It is part of the Avant Garden collection which I don't believe is still out but I could be wrong. On my ring finger I used Avon Nailwear Pro in Urban Gray and over that two random cheap glitters that didn't have labels anymore, sorry. They are both silver glitters, ones very small fine glitter and the other it a more chunky big glitter. I have found that when doing a silver glitter nail using a gray nail polish underneath looks really nice.

Sorry the glitter didn't come out well, glitter doesn't photograph well.

Thanks for reading, please leave any request below!

Friday, July 12, 2013

We Can't Stop by Miley Cyrus Inspired EOTD

Hey,

I am not a Miley fan but I have seriously been obsessing with this song, if you haven't heard it yet some how you need to go listen to it right now! Her makeup in the music video is so light and natural but yet gorgeous. It is seriously the simplest thing to do, but yet it looks so pretty. The color is a bit more noticeable without flash and in person.

What I Used:
  • Urban Decay Primer Potion in Eden
  • Maybelline Color Tattoo in Barely Branded
  • Coastal Scents Fall Festival Palette, shades: Light Apricot, Chamois Nude, Bright Copper, and Gunmetal
  • Other great lid options would be: Urban Decay Chopper or Sin, Mac All That Glitters, or Stilas Kitten, the lid color in Wet n Wild Color Icon trio in Walking on Eggshells.
  • NYC Eye pencil, not sure what the product is called but it's one of the dollar liners in Charcoal
  • Rimmel Lyrca Lash Extender Mascara
  • Rimmel ScandalEyes kohl liner in Nude
What I Did:
  1. I primed my eyes and then used the color tattoo as a base.
  2. Using my finger I mixed a tiny bit of the Bright Copper shade with the Light Apricot eye shadow and patted that onto the lid, and blended it slightly into the crease. You want more of the Light Apricot shadow then the Bright Copper.
  3. I used the nude liner under my brow and blended that out and over top of that I used the Chamois Nude to high light.
  4. I lined my water line and tight line with the gray liner and then set that with the Gunmetal shadow. I pressed this into my top lash line, this gives a liner effect but it much softer then liner, in the video it looked like she had on eyeliner but it was very soft and not intense like a black.
  5. Lastly I applied mascara this really helps give the liner look she had in the video, its much softer then black but defined.
This look is that simple and other then to set the liner I used no brushes! To replicate the rest of the look contour and pair this with a red lip. She had little to no blush on in the video.

Thanks for reading, please leave any request below!

Wednesday, July 10, 2013

Velvet Red Lips

Hey,
I love a red lip, its beautiful, classic but yet timeless. Every girl can pull it off once you find your perfect red. But really the trick to the red lip is confidence and of course knowing what kind of eye makeup to pair with! I love a matte red the most, but lately I have been doing a velvet like effect when doing a red lip and I wanted to share with you how I do it! I am not good at taking pictures of my lips, it's quite difficult, but my lips look really big and full in the picture so that's a plus! That shine is all the shimmer, I also do this with baby powder when I want a purely matte lip.

What I used:
  • Rimmel Lasting Finish Kate Moss Edition in the Red tube in 111, I think it's name is Kiss of Life
  • Avon Glimmersticks Lip Liner in Red Brick
  • Coastal Scents Hot Pot in American Rose,  a medium red with a shimmer/satin finish
  • Concealer, I used a concealer that was too light but I suggest using one that matches your skin tone, I just couldn't find mine at the time. You can see the difference, but this makes the red look much neater and pop even more!
What I Did:
  1. I applied the lipstick, personally I just go straight out of the tube but you can use a brush if your  a perfectionist.
  2. Then I cleaned up any mistake I made by using the lipstick straight from the tube, a lip brush should help eliminate this step! I also use this part to shape my lips, I like a more round pouty lip so I don't use lipstick in the corners of my lips and I round the edges out to give this effect.
  3. I used the liner which is a bight darker then the lipstick to outline my lips and fill in the corners a little. This helps give dimension to the lip. I do this afterwards because I find that it just works better to give this effect.
  4. I then set this, you can use an eyeshadow brush but I just use my fingers, I take some of the shadow and press it onto the lips, this will make your lips dry. It mattifies the lipstick but gives it a satin almost velvet effect. This looks more velvet like in person then in a photo.
Note this is a bit drying for your lips but looks great, last a long time and is fairly transfer proof!

Thanks fore reading, please leave any request below!

Sunday, July 7, 2013

June Favorites 2013

Hey,
Were half way through 2013! This summer is flying by and it's that time for monthly favorites, I haven't done one of these in a while and I don't have to many things but I still wanted to share what I have been loving this month!

Lets start with the thing I have loved the most, Naked Basics. What can I say, everyone raved about this palette and what's not to love a palette of five matte neutrals and one shimmer. I have used this palette loads throughout the month, its so great for grunge looks to classic pin up looks. Out of all the colors my favorite has to be Walk of Shame, just a matte skin tone but yet it is so beautiful and great on the lid.

Next are the two most used lip colors of the month, I rave about these lipsticks all the time and that would be the Rimmel Lasting Finish Lipsticks, especially the Kate Moss line. The color I have obsessed over this month is 110, a gorgeous bright coral, great for summer. The other lip color I have loved is one of the L'oreal Colour Caresse Wet Shine Stain in Rose On and On, I hate the packaging but love the color and product, I don't feel like it last for ever but I do like the texture, it's not for everyone since it is quite sticky and not always very comfortable/

Back to eye products, the Rimmel Lycra Lash Extender is so nice, at first it wasn't anything special but now it's so amazing it lengthens and add a bit of volume. Another Rimmel product I have been loving are the ScandalEyes kohl liners in Dark Brown and Nude, I have been using the brown in my tightline and switching between it and the nude in my waterline. I also really like using the nude under my brow to really highlight and make my brow stand out. Last thing for the eyes would be the Maybelline 24 hour color tattoo in Barely Branded. Just shimmer skin tone, its great under shadows, I don't personally use this on its on, I tried it once and creased on my in an hour.

Last product would be the ELF Contouring and Blush Duo, this is the original one. The bronzer is the perfect shade for my skin. I personally love a strong contour and this give me an almost drag queen one!

I have seriously been terrible at blogging these past week, but I have a few post coming out this next week. What are you favorite products this month?

Thanks for reading, please leave any request below!

Friday, June 28, 2013

Night Look Using Colors

Hey,
Using a color with a black is one of the easiest ways to use colored eye shadow and makes a great night look! This look is great for summer nights out and you can switch up the color on your lid with any color. I have a look fairly similar to this look that you can check out here.

What I used:
  • Urban Decay Primer Potion
  • Wet n Wild Cream Eyeliner in black
  • Coastal Scents 42 Double Matte palette; black, purples, white, lightest brown
  • Rimmel Scandal Eyes Mascara, orange cap
What I did:
  1. I primed my eyes and set that with my face powder.
  2. I drew the shape I wanted with the black cream eyeliner and filled in where I was going to place the black eye shadow.
  3. Then I patted on a black eye shadow over that and blended out the edges and into the crease.
  4. I used the lightest brown shadow in the crease, you don't want this to be noticeable so afterwards go over it with the black again.
  5. I patted the lightest purple shadow on the inner part of my lid, then a shade that was about two shades darker in the middle, then the darkest purple on what's left of the lid. While doing this blend each color into each other, since these shades are similar they will blend into each other easily.
  6. Apply a thin line of eyeliner

    on the top and in the tight line and waterline, set this with the black liner.
  7. Smudge the black shadow on the outer third of the lower lash line, a mix of the darkest and medium purple in the middle and the lightest in the inner third. Remember to blend these all into each other.
  8. Highlight under your brow bone and inner corner with a white eye shadow
  9. Lastly apply a few coats of your favorite mascara and/or false lashes. Fill in your brow and finish your face.
This look, looks best with lots of bronzer, a little highlighter and a nude lip.

Thanks for reading, please leave any request below!

Wednesday, June 26, 2013

50$ at Sephora!

Hey,
I thought it would be fun and helpful to make a post about what I would suggest getting at Sephora with 50$. So if you got a gift card or just have never been to Sephora then hopefully this will help! I am going to just put this out there right now 50$ at Sephora isn't much, these are things that I would either get or have and love.

Lets cover eye shadow palettes first, when it comes to high end makeup I feel eye shadow palettes are the most worth it. The Naked palettes, are great and so worth it, but if you want a few things then these aren't going to be the thing for you, these are 50$ each. Although there is the Naked Basics palette, which I plan on dedicating a whole post on that palette next week. This palette is 27$ so you could definitely get something else to go with this. Another palette I absolutely love is the Ooh La Lace palette by Lorac, this palette is only 36$, they have their Pro palette, I personally don't have this but have heard great things and do intend on picking it up soon. Another great option are the Stila Trios they are 18$ and Stila eye shadows are great and this trios are such a steal! Other palette I don't have but have heard good things about and intend on getting are: UD Smoked palette 49$, Stila In The Light Palette 39$, and any other Urban Decay palette they range from 27$-50$ and great and worth the money!

Any set is a great deal and usually worth the value, great sets are: Benefit Primping With the Stars 32$, Getting Cheeky 17$ and the Rich is Back box set 34$, Stila Lip Trios 12$

Single products that are great: Buxom Big and Healthy Lip Creams 19$, Nars Blush 29$, OCC Lip Tars 18$, Tarte Amazonian Clay Blush 26$ Kat Von D Tattoo Concealer 25$, Makeup Forever Full Cover Concealer 32$ and Tarte Lipsurgence 24$

There are a lot more things at Sephora that are great but I don't want to list a million things so if you like this and would like another one of these let me know! What are some of your favorite things at Sephora?

Thanks for reading, please leave any request below!

Friday, June 21, 2013

Bronze Slutry Eyes

Hey,

This look is easy and so pretty for a night out this summer. It is using one palette and just a few other products. The palette used for this look was the Ooh La Lace palette by Lorac, it is a great palette for both day and night looks, it comes with six baked shadows, enough about the palette, but if you would like to know more about it I have a review on it which you can see here.
 
What I used:
  • Urban Decay Primer Potion in Eden
  • Lorac Ooh La Lace palette, all shades excepts the gray
  • Rimmel Scandal Eyes Kohl Liner in Brown
  • Avon Glimmersticks Diamonds in Flashy Copper
  • ELF Liquid Eyeliner in Black
  • Random unknown mascara
What I did:

  1. Primed my eyes with UD Primer Potion, I set this with my face powder
  2. Lined my eyes with the brown liner and put a little in the outer v, I then blended this out with my finger.
  3. I packed the brown from the palette over the liner then blended it out into the crease. I also smoked it out on my lash line.
  4. I added more brown to the outer v and crease till it was as dark as I wanted.
  5. I dabbed my brush very lightly into the black then blended this into my outer v, just the littlest black, I didn't want it to look like there was any black but just darken up the outer v without using any other palettes or single shadows.
  6. I patted on the bronze shade to my lid and blended the edges, I also took this slightly into the inner part of my crease.
  7. I highlighted under my brow and made sure all edges were blended out with the lightest shade in the palette.
  8. I lined my lower lash line, tight and water line with the brown liner, leaving the inner corner and very inner third clean. I lined the inner third with the copper liner.  
  9. I set all the liners with coordinating colors and blended the brown liner out.
  10. I lined my top lash line with the liquid liner and applied a few coats of mascara.
  11. Lastly I cleaned up the edges, applied concealer, and did my eyebrows.
Thanks for reading, please leave any request below!

Wednesday, June 19, 2013

How I Do My Eyebrows


Hey,
Before
After
Everyone seems to have a different way of doing their eyebrows, some complicated some very simple. This is just what I typically do, sometimes I do use powder instead.
My brows are naturally good, so there's not to big of a difference nor do I have to do much to them. But there is a pretty noticeable difference in person.
 
What I use:
  • Avon Perfect Brow Pencil in Dark
  • Rimmel Professional Brow Pencil in 002 Hazel
  • ELF Clear Mascara and Brow Gel
What I do:
  1. The first thing I do is pluck all the random hairs and make sure that my brows are in the shape I want them.
  2. I use the Avon pencil which is darker then the Rimmel pencil, I only use this to fill in my arch.
  3. Then I lightly do the beginning of my brows. 
  4. I pencil in the ends darker then the beginning of my brows but not as dark ad the arch.
  5. I use a spoolie and run this throw my brows to blend it all together.
  6. Lastly I set my brow with a clear gel. I didn't set my brows in the picture but normally I do.
I don't believe the Avon pencil is still available but if so or you can find it give it a try, its a great brow pencil, and I wouldn't recommend the Rimmel one, personally I am just using it up, it is very dry and just not the best pencil out there, you can get better for less. I have heard good things about the Wet n Wild Color Icon pencils for the brows.
 
 
What is your brow routine?
 

Thanks for reading, please leave any request below!
 

Monday, June 17, 2013

Mani Monday: Sunny Days with an Orange Fix

With flash
Hey,
This week I decided to do something bright for summer on my nails, these nails are really cute and fun for summer.. The colors I used were Rimmel 60 Second polish in Sunny Days and Maybelline Color Show polish in Orange Fix. I did four coats of the yellow, this one isn't as opaque as I would like but with a white base underneath two coats should work great. For the accent nail the orange only took two coats and the orange polka dots went on in one coat, but I did go over a few making a few darker. I used no base coat, and the Sally Hansen Insta-Dri top coat.

With natural lighting
 Thanks for reading, please leave any request below.

So far both polishes are holding up well, but the yellow didn't dry to nice and got a little messed up since I used so many coats.
 

Friday, June 14, 2013

Neutral Cut Crease

Sorry for the messy mascara on the lower
lash line, this is a normal part of my daily
makeup, mascara in places it doesn't belong!
Hey,

This week I was really feeling the neutrals, but I did want to try something different. I went with a wearable cut crease look that is great for day time. I used a total of seven different products to create this look.

What I used:
  • Rimmel Scandal Eye Eyeliners in Brown and Nude
  • Maybelline Single in Made for Mocha
  • Urban Decay Naked Basics palette, I used W.O.S., Faint, Naked 2, Foxy, and Venus
  • ELF Liquid Liner
  • Random mascara, sorry I really don't remember the name of it

First I cut the crease, through my crease I just drew a line with the brown eyeliner. I did this as neatly as possibly. You really just want to outline your crease. I then blended that out with the Maybelline single, which is a dark brown. I continued to blend my crease out with Faint and then over that mainly around the edges I used Naked 2. I then highlighted under my brown with foxy. After I finished the crease I used the nude liner as a base on my lid and inner corner, I used W.O.S. over that and Venus as my inner corner highlight. Using the brown liner again I smudged this along my lash line and then blended it out again with the Maybelline single for a more smokey look. I went over the edges of that with W.O.S. to blend it out as much as possible. I then lined my lower lash line and waterline and tight line, except for the inner corner. I set this along with blending it out with yet again that Maybelline single. I did a thin line of liquid liner on my top lid and then a quick coat of mascara on both top and bottom lashes.

Side note if you see this single I really suggest it, its pigmented and a great cheap single that I find is great for darkening up any look!


Do you rock the cut crease?

Thanks for reading, please leave any request below!

Wednesday, June 12, 2013

Coffee Scrub

Hey,
I love coffee, its great for your body and skin. For this scrub I mix about two tablespoons of coffee with enough olive oil to make a paste, I then add half a teaspoon of both cinnamon and nutmeg to help with acne. You want to use ground coffee, instant will work but not as well. The nutmeg and cinnamon are optional. I then massage this onto my clean face for a minute then I let it sit for between 5-10 minutes then I rinse it off with warm water and go on with my skin care routine. This scrub helps with acne, is brightening and hydrating, and with all the sun exposure you get during the summer hydrating scrubs and masks are a must!

Have you ever used coffee as a mask or scrub?

Thanks for reading, please leave any request below!

Monday, June 10, 2013

Mani Monday: Caramel Cupcake


What it looks like in sunlight
Hey,

This week I went with Rimmel 60 Second polish in Caramel Cupcake, its a pretty nude. Unfortunately this color is not flattering with my skin tone, so if you have a medium skin tone you may want to pass on this polish, although it looks gorgeous in the sun; it makes your hands look like mannequin hands. It would probably look nice on some one with either a dark skin tone or a light skin tone. The polish itself is great, has nice lasting power, goes on opaque in two coats which for a nude this cheap is amazing, it also applies so easily. These polishes truly are great and I would recommend them, but this shade just isn't a good color for me.

What it looks like in natural lighting
I think from now on I'm going to include picture of what the polish looks like in natural light and in the sun. I'm also going to try to get back into blogging by doing at least three post a week.

Thanks for reading, please leave any request below!

Thursday, June 6, 2013

Ways to Change Up Your Manicure

No one likes chipped nails and the same
manicure can get boring.
Hey,
 
Do you have chipped nails, getting bored with your manicure mid-way through the week, or tired of the same old one color manicure week after week but not so great at nail art? Well if any of those apply to you then this post is perfect for you! I want to share with you a few easy ways to change up any manicure and a few that hide those chipped tips. I personally only like to paint my nails once a week so this is what I often do to cover up the chipping, I may add on to these and do a part two. The green is Rimmel 60 Second polish in Sage All the Rage and the brown is Sally Hansen Complete Manicure in Commander in Chic. Both featured in a haul recently you can see that here and the green was just in my past Mani Monday, which you can see here. Also when doing these try to pick an opaque polish to make these much easier.
The middle one isn't actually pointy it's the
light reflecting.
 
So the first thing I like to do is like a half moon manicure but with a triangle, this has been pretty trendy lately and is a fun twist on the half moon manicure, I used a post it, pretty strange but it worked pretty good. I cut one of the corners on the sticky side and stuck that on the base of my nail and then painted the tip, I did have to touch up the green because it was a little messy so painting on the triangle would probably be easy if you aren't trying to cover up any chipping. To do that I would use two pieces of tape and just tape them onto the nail forming a triangle at the base.
 
Next is one of my personal favorites, I actually do polka dots on my nails fairly often. I think they are super cute and good for any color combo, and they look great as an accent or on all of your nails. I use the ball of a sewing pin but a dotting tool is the more conventional way, I just don't own one. I have also used lollipop sticks for bigger dots and that worked really great.
 
The half moon manicure is a pretty popular easy nail art trick. The most common way and the method I used was using binder reinforcement labels, these can be found at store like Target, Walmart and any other drugstore for around a dollar. You just stick these on the base of the nail as low or as high as you'd like and then paint the tip, wait 30 seconds then remove the binder reinforcement label.
 
This next one is pretty easy and really cute, all you do is paint thin vertical strips and then paint the top third. This adds a little bit more then a French tip but also covers your chipping.

Lastly is the French tip, classic and so looks great with any color combination. I just free hand this, but I have always heard that if you move your finger instead of the brush it makes the perfect strip. You can also try the binder reinforcement labels and tape to achieve that perfect tip.

What are your favorite ways to spice up your manicure or hide chipping? Remember none of these have to look perfect, mine sure don't but I still always get compliments on them so don't worry about them not looking perfect, they are just easy ways that anyone can do.

Thanks for reading, please leave any request below!

Monday, June 3, 2013

Mani Monday: Sage All The Rage

Hey,
 
This week I decided to paint my nails with the sage green I hauled Sunday, you can see that post here. In that post I mentioned that I have been loving neutrals lately and this color is gorgeous. It is the perfect sage color, better for fall then summer but still gorgeous now. I did two coats and then used Sally Hansen Insta-Dri topcoat, I love the way this polish applies, it went on so easily since the brush is huge and I didn't get it on my skin at all, I will definitely be picking up more of these polishes and suggest them to you too!

Thanks for reading, please leave any request below!

The picture is pretty accurate in what the color look like in person.

Sunday, June 2, 2013

Collective Haul

Hey,

I'm not going to waste any time and just jump right into these products because there is quite a few so lets start with my favorite lipstick! I also want to add I haven't tried many of these most were bought today.

 
From left to right: Revlons 012 Sky Pink and 668 Primrose, Rimmel 110, 111 Kiss of Life, and 17 and lastly Maybelline from the Vivids in Shocking Coral, as you probably know I love Rimmel lipsticks and I'm getting pretty close to having all of the red ones, I'm patiently waiting for the Apcolips lipglosses to come to the US but I have a feeling from what I have hear about those they will be like the Kate lipsticks and I will feel the need to get them all, does anyone know when they are coming to the US?
 
 
From left to right: 110(swatched twice), 111 Kiss of Life, 17, Sky Pink, Primrose

 
From left to right: Red Dynamite, Spice (both not mentioned yet but next), Shocking Coral and 110 again.
 
 
Rimmel Scandaleyes Kohl pencil liner in Nude, Lasting Finish lip liners in 021 Red Dynamite, I thought that I got a different color but you can never have enough reds and 011 Spice, I love these liners I haven't used these specific colors yet but all three are fantastic!
 
 
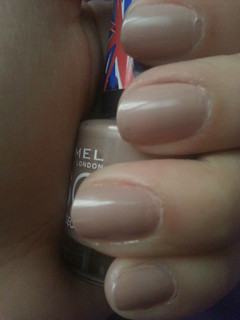
What kind of haul would this be without nail polish! From left to right: Maybelline Color Show in Orange Fix, Rimmel 60 seconds in 710 Sunny Days, 220 Sage All the Rage, and 311 Caramel Cupcake, Sally Hanson Complete Salon Manicure in 250 Mudslide and 290 Commander in Chic, even though it's summer I have been loving and by that I mean obsessing over nudes lately, especially ones leaning on the taupe side.
 
 
Salon Perfect Lashes in Demi Wispies, these are gorgeous I wore them for my graduation and they looked amazing without any mascara! Revlon Clear Precision Lash Adhesive, I like this but I don't think its as great as everyone makes it out to be, maybe it was just the way  used it but it did last the whole time I needed it to so I have no complaints. Rimmel Clean Finish Matte in Classic Beige, sorry for the crappy pictures, I really like this with a primer and setting powder it last the whole day for me, it doesn't stay matte but it doesn't look bad either.
 
 
Maybelline Color Tattoo Metal in 70 Barely Branded, I finally caved and got one! Rimmel Match Perfect concealer in medium and Rimmel Fix and Perfect Pro in 002, this when swatched was really nice so I have high hopes for it and all of these products!
 
 
Lastly I finally picked up Naked 2, I already have the original but I knew I wanted both and what can I say I am a sucker for mattes so I had to get the Naked Basics too, and already Walk of Shame is my new favorite shadow!
 
Next time Rite Aid has a 40% off Wet n Wild I plan on picking some stuff up so be expecting a haul from that soon! Have you tried any of these, what are your thoughts on them? Sorry for bad swatches and pictures! Also for this not being anything more then right to the point to get through it, but a lot of these I didn't have much of an opinion on yet, if there is anything you would like reviewed let me know!
 
Also I know I have been very on and off with my blogging but I have been super busy and I should get back to track soon now that I'm done with school, I also mught do a clothing haul soon, even though fashion isn't my thing.
 
Thanks for reading, please leave any request below!

Friday, May 17, 2013

Sunset Eyes

Hey, lately I have been playing around with colors, trying to master using nothing but colors and mixing in no neutrals. I am a neutral girl, I wear them everyday and have them mastered and therefore I don't really step into the realm of colored makeup and this spring I am making it my goal to experiment and wear more colors, other then on my lips! Whether it be bright cheeks or bright eyes I am going to start breaking out of my shell and rocking them more! And I suggest this to all of you neutral lovers too!

So I decided to share my recreation of a sunset look, I have seen pictures of these looks all over the Internet lately and loved the look so I wanted to give it ago and I loved the way it turned out so I wanted to share it with you!


Products I used:
UD Primer Potion in Eden
Coastal Scents 42 Double Stack Matte palette, both yellow shades, bright orange, red light and medium, tan, white, blue and turquoise shades
ELF Liquid Eyeliner
Wet n Wild Coloricon eyeliner in Turquoise
LA Color eyeliner in Electric Blue
Loreal Voluminous Million Lashes in Black

What I did:
First thing, of course, I primed my eyes with UD Primer Potion, I then swept the tiniest bit of a tan shade into my crease to help with blending, this isn't a must I just like to do this, in the end you will not see this at all. After that I started with the colors on the lid, I first put a light yellow on the inner third of my lid and inner corner, after that I used an orangish yellow in the middle, I blended the two yellow shades together, they where fairly close to each other and blended into each other easily. Then I added the orange onto the outer third, this took a little more blending but I just went over the line with the two colors till it was a seamless transition. I then blended a red into the crease and outer v, I used a lighter red to help blend this out and then highlighted with a white and blended it all out more. Before moving onto liner and the lash line I went over the colors on my lid to get the brightness I wanted. I did a quick thin winged liner close to the lashes, nothing special or perfect. I put a bright blue liner to represent water in my water line and a turquoise liner under that in the lashes. I set these and blended them out with coordinating colors. I also blended the turquoise shadow a bit under the wing. Lastly I applied a few coats of mascara.

For this look I would just do a bronzed cheek,nude lip and a cute black sundress or even one with one of the colors in the look like orange, yellow or red. It would also look great with false lashes.

Are you daring enough to wear a look like this in public?

Thanks for reading, please leave any request below!