Showing posts with label natural. Show all posts

Friday, August 9, 2013

First Impression: Covergirl Flamed Out and Maybelline Big Eyes Mascaras

Hey,

I got the Maybelline Big Eyes mascara a few weeks ago and earlier this week Covergirls Flamed Out mascara earlier this week. I wanted to share by first impressions on these mascaras but felt it wasn't enough for one post so I figured I'd combine them and then tell you which one I'd suggest.
 
Let's start with the Maybelline Big Eyes mascara. What's really cool about this mascara is that it has a separate mascara for the lower lashes, which is a nice mascara. But with that said the mascara for you upper lashes doesn't do anything, I tried this and so did my mother and neither of us felt like it did anything. It's like putting nothing on your lashes and no matter how much you work with it is barely shows up. To me it's not even a natural look it just looks like you have nothing on, this isn't what I kook for in a mascara at all, I have fairly nice lashes and this doesn't do anything to them other then tints them, so no matter your lashes I'd say skip on this, it does nothing at all. It's quite the let down for Maybelline mascaras. I honestly couldn't even tell you how this weird since I can't see it to say if it's still on in a few hours. The brush on the top lash mascara is thin, it tapered to the tip and has a twist in the brush. The lower lashes mascara I'd just small and straight nothing special, your typical wand for the lower lashes.
 
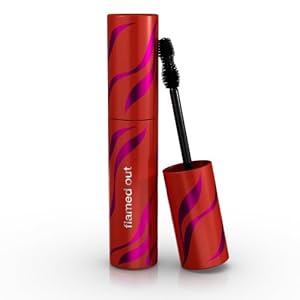
The Covergirl Flamed Out mascara on the other hand is nice, it gives a natural look but it is still really nice. It wears great, I actually fell asleep with this on and it looked the same as it did before I fell asleep, I have experienced no flaking. It doesn't make your lashes hard and it holds a curl. This does need to be built up if you want to have more then a natural look but two coats looks nice too. The brush is a bit different, it's smaller in the middle and the tip and base seem to be the same size, the brush is really good and this mascara doesn't leave clumps.
 
Both of these mascaras are around the same price and where one can be bought the other one should be able to be bought there too. The Covergirl mascara is the one I would suggest, skip on the Maybelline mascara it really doesn't do anything.
 
Have you tried either of these, what are your thoughts on them?
 
Thanks for reading, leave any request below!

Wednesday, June 19, 2013

How I Do My Eyebrows


Hey,
Before
After
Everyone seems to have a different way of doing their eyebrows, some complicated some very simple. This is just what I typically do, sometimes I do use powder instead.
My brows are naturally good, so there's not to big of a difference nor do I have to do much to them. But there is a pretty noticeable difference in person.
 
What I use:
  • Avon Perfect Brow Pencil in Dark
  • Rimmel Professional Brow Pencil in 002 Hazel
  • ELF Clear Mascara and Brow Gel
What I do:
  1. The first thing I do is pluck all the random hairs and make sure that my brows are in the shape I want them.
  2. I use the Avon pencil which is darker then the Rimmel pencil, I only use this to fill in my arch.
  3. Then I lightly do the beginning of my brows. 
  4. I pencil in the ends darker then the beginning of my brows but not as dark ad the arch.
  5. I use a spoolie and run this throw my brows to blend it all together.
  6. Lastly I set my brow with a clear gel. I didn't set my brows in the picture but normally I do.
I don't believe the Avon pencil is still available but if so or you can find it give it a try, its a great brow pencil, and I wouldn't recommend the Rimmel one, personally I am just using it up, it is very dry and just not the best pencil out there, you can get better for less. I have heard good things about the Wet n Wild Color Icon pencils for the brows.
 
 
What is your brow routine?
 

Thanks for reading, please leave any request below!
 

Monday, June 10, 2013

Mani Monday: Caramel Cupcake


What it looks like in sunlight
Hey,

This week I went with Rimmel 60 Second polish in Caramel Cupcake, its a pretty nude. Unfortunately this color is not flattering with my skin tone, so if you have a medium skin tone you may want to pass on this polish, although it looks gorgeous in the sun; it makes your hands look like mannequin hands. It would probably look nice on some one with either a dark skin tone or a light skin tone. The polish itself is great, has nice lasting power, goes on opaque in two coats which for a nude this cheap is amazing, it also applies so easily. These polishes truly are great and I would recommend them, but this shade just isn't a good color for me.

What it looks like in natural lighting
I think from now on I'm going to include picture of what the polish looks like in natural light and in the sun. I'm also going to try to get back into blogging by doing at least three post a week.

Thanks for reading, please leave any request below!

Friday, August 17, 2012

Light makeup; "back to school" part one!

Hey,

I'm only going to do two back to school looks; I don't personally like these because for me its not what I would wear since they are always light and barely there. That's not how I am so back to school post and videos aren't for me, I'm not a flats and no makeup type of girl, I like wearing heels pretty much daily to school, but every ones different. So I decided I would do two looks a light look for those who are younger and then something I would wear to school, and the best part is both looks are using the same eye shadows!

Products:
Primer
Coastal Scents Fall Festival palette, you need a skin tone shimmery shade and a matte one(you can use your setting powder), a bronze, and a dark brown, you don't have to use that palette though. The numbers of the shades I used were: # M004 Chamois Nude, # ME017 Light Apricot, and # S030 Cherry Chocolate.
Brown eyeliner
Either a bronze, white, or skin tone eyeliner, I used a bronze one.
Mascara, I actually didn't use any in this look because I didn't feel like putting any on when I was just going to take it off, but normally I would have.

First thing I did was put down some eye primer then set that. After I primed my lids I did a light wash of the skin tone shimmery shade. Next I blended the bronze color into my crease lightly so it wasn't very dark, lastly for the shadows I lightly blended the dark brown through my outer v and half way into the crease, and use the matte skin tone shade to make sure everything is blended and too highlight.


Then I lined my upper lash line mainly in my lashes, I smudged a bit on my outer corner and blended it out. After that I lined my lower lash line leaving my waterline untouched, I also blended that out too but not as much. I then lined my waterline and set it with the shimmery skin tone shade, while doing that I highlighted the inner corner too. Then apply mascara and you have a great natural look for either work, school, or anytime.

Thanks for reading, please leave any request below!

Links:
Palette I used
Brushes, use code Save2012 for 10% off during August!


Monday, August 13, 2012

Mani Monday: Ballerina

Hey,
This week I just wanted something pretty and natural but still there. I went with Avon Speed Dry+ Nail Enamel in Ballerina, its a gorgeous soft pink that just leaves your nails looking natural but still pretty and polished. This polish is extremely sheer, it took three coats to get it that opaque, but I can still see the tips of my nails and a little white dot I have on my nails through the polish. This is great for someone who doesn't like bright colors or if you can't were them for work or school, its also a great anytime polish; good for summer, spring, fall and even winter because its so soft and natural. I didn't use any base coat but I did use top coat this week, which was Seche Vite as usual, but if you get this or have this or something similar using a white or a lighter pink that's opaque underneath will give it a gorgeous look, this is also a great polish to match shimmery top coats with.

Thanks for reading, please leave any request below!

Nail polish 
Seche Vite, you can check out my review on this here.