Showing posts with label simple. Show all posts

Friday, July 12, 2013

We Can't Stop by Miley Cyrus Inspired EOTD

Hey,

I am not a Miley fan but I have seriously been obsessing with this song, if you haven't heard it yet some how you need to go listen to it right now! Her makeup in the music video is so light and natural but yet gorgeous. It is seriously the simplest thing to do, but yet it looks so pretty. The color is a bit more noticeable without flash and in person.

What I Used:
  • Urban Decay Primer Potion in Eden
  • Maybelline Color Tattoo in Barely Branded
  • Coastal Scents Fall Festival Palette, shades: Light Apricot, Chamois Nude, Bright Copper, and Gunmetal
  • Other great lid options would be: Urban Decay Chopper or Sin, Mac All That Glitters, or Stilas Kitten, the lid color in Wet n Wild Color Icon trio in Walking on Eggshells.
  • NYC Eye pencil, not sure what the product is called but it's one of the dollar liners in Charcoal
  • Rimmel Lyrca Lash Extender Mascara
  • Rimmel ScandalEyes kohl liner in Nude
What I Did:
  1. I primed my eyes and then used the color tattoo as a base.
  2. Using my finger I mixed a tiny bit of the Bright Copper shade with the Light Apricot eye shadow and patted that onto the lid, and blended it slightly into the crease. You want more of the Light Apricot shadow then the Bright Copper.
  3. I used the nude liner under my brow and blended that out and over top of that I used the Chamois Nude to high light.
  4. I lined my water line and tight line with the gray liner and then set that with the Gunmetal shadow. I pressed this into my top lash line, this gives a liner effect but it much softer then liner, in the video it looked like she had on eyeliner but it was very soft and not intense like a black.
  5. Lastly I applied mascara this really helps give the liner look she had in the video, its much softer then black but defined.
This look is that simple and other then to set the liner I used no brushes! To replicate the rest of the look contour and pair this with a red lip. She had little to no blush on in the video.

Thanks for reading, please leave any request below!

Friday, June 28, 2013

Night Look Using Colors

Hey,
Using a color with a black is one of the easiest ways to use colored eye shadow and makes a great night look! This look is great for summer nights out and you can switch up the color on your lid with any color. I have a look fairly similar to this look that you can check out here.

What I used:
  • Urban Decay Primer Potion
  • Wet n Wild Cream Eyeliner in black
  • Coastal Scents 42 Double Matte palette; black, purples, white, lightest brown
  • Rimmel Scandal Eyes Mascara, orange cap
What I did:
  1. I primed my eyes and set that with my face powder.
  2. I drew the shape I wanted with the black cream eyeliner and filled in where I was going to place the black eye shadow.
  3. Then I patted on a black eye shadow over that and blended out the edges and into the crease.
  4. I used the lightest brown shadow in the crease, you don't want this to be noticeable so afterwards go over it with the black again.
  5. I patted the lightest purple shadow on the inner part of my lid, then a shade that was about two shades darker in the middle, then the darkest purple on what's left of the lid. While doing this blend each color into each other, since these shades are similar they will blend into each other easily.
  6. Apply a thin line of eyeliner

    on the top and in the tight line and waterline, set this with the black liner.
  7. Smudge the black shadow on the outer third of the lower lash line, a mix of the darkest and medium purple in the middle and the lightest in the inner third. Remember to blend these all into each other.
  8. Highlight under your brow bone and inner corner with a white eye shadow
  9. Lastly apply a few coats of your favorite mascara and/or false lashes. Fill in your brow and finish your face.
This look, looks best with lots of bronzer, a little highlighter and a nude lip.

Thanks for reading, please leave any request below!

Wednesday, June 19, 2013

How I Do My Eyebrows


Hey,
Before
After
Everyone seems to have a different way of doing their eyebrows, some complicated some very simple. This is just what I typically do, sometimes I do use powder instead.
My brows are naturally good, so there's not to big of a difference nor do I have to do much to them. But there is a pretty noticeable difference in person.
 
What I use:
  • Avon Perfect Brow Pencil in Dark
  • Rimmel Professional Brow Pencil in 002 Hazel
  • ELF Clear Mascara and Brow Gel
What I do:
  1. The first thing I do is pluck all the random hairs and make sure that my brows are in the shape I want them.
  2. I use the Avon pencil which is darker then the Rimmel pencil, I only use this to fill in my arch.
  3. Then I lightly do the beginning of my brows. 
  4. I pencil in the ends darker then the beginning of my brows but not as dark ad the arch.
  5. I use a spoolie and run this throw my brows to blend it all together.
  6. Lastly I set my brow with a clear gel. I didn't set my brows in the picture but normally I do.
I don't believe the Avon pencil is still available but if so or you can find it give it a try, its a great brow pencil, and I wouldn't recommend the Rimmel one, personally I am just using it up, it is very dry and just not the best pencil out there, you can get better for less. I have heard good things about the Wet n Wild Color Icon pencils for the brows.
 
 
What is your brow routine?
 

Thanks for reading, please leave any request below!
 

Thursday, June 6, 2013

Ways to Change Up Your Manicure

No one likes chipped nails and the same
manicure can get boring.
Hey,
 
Do you have chipped nails, getting bored with your manicure mid-way through the week, or tired of the same old one color manicure week after week but not so great at nail art? Well if any of those apply to you then this post is perfect for you! I want to share with you a few easy ways to change up any manicure and a few that hide those chipped tips. I personally only like to paint my nails once a week so this is what I often do to cover up the chipping, I may add on to these and do a part two. The green is Rimmel 60 Second polish in Sage All the Rage and the brown is Sally Hansen Complete Manicure in Commander in Chic. Both featured in a haul recently you can see that here and the green was just in my past Mani Monday, which you can see here. Also when doing these try to pick an opaque polish to make these much easier.
The middle one isn't actually pointy it's the
light reflecting.
 
So the first thing I like to do is like a half moon manicure but with a triangle, this has been pretty trendy lately and is a fun twist on the half moon manicure, I used a post it, pretty strange but it worked pretty good. I cut one of the corners on the sticky side and stuck that on the base of my nail and then painted the tip, I did have to touch up the green because it was a little messy so painting on the triangle would probably be easy if you aren't trying to cover up any chipping. To do that I would use two pieces of tape and just tape them onto the nail forming a triangle at the base.
 
Next is one of my personal favorites, I actually do polka dots on my nails fairly often. I think they are super cute and good for any color combo, and they look great as an accent or on all of your nails. I use the ball of a sewing pin but a dotting tool is the more conventional way, I just don't own one. I have also used lollipop sticks for bigger dots and that worked really great.
 
The half moon manicure is a pretty popular easy nail art trick. The most common way and the method I used was using binder reinforcement labels, these can be found at store like Target, Walmart and any other drugstore for around a dollar. You just stick these on the base of the nail as low or as high as you'd like and then paint the tip, wait 30 seconds then remove the binder reinforcement label.
 
This next one is pretty easy and really cute, all you do is paint thin vertical strips and then paint the top third. This adds a little bit more then a French tip but also covers your chipping.

Lastly is the French tip, classic and so looks great with any color combination. I just free hand this, but I have always heard that if you move your finger instead of the brush it makes the perfect strip. You can also try the binder reinforcement labels and tape to achieve that perfect tip.

What are your favorite ways to spice up your manicure or hide chipping? Remember none of these have to look perfect, mine sure don't but I still always get compliments on them so don't worry about them not looking perfect, they are just easy ways that anyone can do.

Thanks for reading, please leave any request below!

Tuesday, March 26, 2013

EOTD: Taupe, Making Hazel Eyes Appear More Green

Hey,

I have hazel eyes and personally I prefer green eyes over brown so I am always trying to get my eyes to appear to be more green. I found that taupe shadow really does this for me, I have just been loving looks like this recently, using only three shadows and little to no eyeliner with messy mascara. Typically for these looks I use either taupe, bronze, or a tan and then add in a nice dark warm brown to my outer v and highlight with a champagne. The makeup looks a bit darker in person and my eyes look greener too. 

Today, I used a Maybelline single in Tastefully Taupe all over the lid and through the crease, I then put another Maybelline single in Made for Mocha in the outer v and highlighted my inner corner and under the brow with an eyeshadow from a Wet n Wild trio in Walking on Eggshells, the top color. I smudged a bit of the taupe on my lower lash line and on the outer corner I smudged the dark brown. Under my brow and inner corner before I applied eyeshadow I used a Wet n Wild Creme Shadow Pencil in Pixie and Urban Decay Primer Potion in Eden. This has been my go to look all week and it will probably be my most worn look this summer. For mascara I used Avon Astonishing Mascara in brown/black, I don't think they make this any more. I like to pair this eye look with lots of bronzer, peach blush and either a light pink gloss or a pink gloss.

Thanks for reading, please leave any request below!

Monday, November 5, 2012

At home cuticle oils

Hey,

My cuticles are always dry and personally I can never remember to buy cuticle oil nor find it something I want to spend very much money on. These are a few alternatives I use that I and have heard of through others.

Lip balm, you would be surprised of the uses you can get out of lip balm, I find that the Vaseline and Carmex lip balms in the squeeze tubes work best. I just squeeze a little out, you need the tiniest amount, and just massage this into my cuticles. You could use just petroleum jelly without the chemicals, it doesn't make a difference, I just personally use the lip balm.

Oils, coconut, olive, hemp, vitamin E, and tea tree, these types of oils are great alone or mixed together, I have dry hands so I like to exfoliate with these types of oils and the rinse of just the sugar or salt and leave the oil on my hands and cuticles and put on a thick layer of lotion and a pair of gloves, I sleep with this and find that not only my hands but my cuticles are moisturized once I wake up. This is good to do once a week, depending on how dry your hands and cuticles are. I don't think I could have said and anymore in that last sentence.

The way that works best for me is applying these such things to my hands after I get out of the shower, but you could just soak your fingers in warm water for five minutes. The reason you want to soak them first is the oil or petroleum jelly will lock in the moisture that is added from the water and keep your cuticles softer longer, it will also do more overall for your cuticles this way.

I hope this helps! Do you have any other things you use to keep your cuticles moisturized or a great cheap cuticle oil?

Thanks for reading, please leave any request below!

Sunday, October 28, 2012

Apple Face Mask

Hey,

I love apples and they are everywhere during fall and they make great face masks too! All you need is two things for this face mask, one large apple and honey.

The first thing you need to do is peel the apple and remove the cores and seeds. After that you blend the apple and mix in 2 tablespoons of honey. Once everything is well mixed you cover this and store it in the fridge for 10 minutes, then you apply to your face and let sit for 15 minutes afterwards you rinse off and wash/tone/moisturize your face like normal. If this causes irritation remove it immediately.

This face makes not only has vitamins that are good for your skin but can help prevent wrinkles, dulling skin, shrink pores, and gently exfoliate.

Have you tried this mask? If you try this please share with me how it worked for you!

Thanks for reading, please leave any request below!

Sunday, October 21, 2012

Brown sugar face mask/scrub

Hey,

This face mask is one that I have been doing for quite some time and saw in a magazine years ago, I want to say it was Seventeen but I could be wrong. This is such a simple face mask/scrub; it only requires two ingredients and only take fifteen minutes from start to finish. This really helps with acne and gives you soft skin, and these are things almost everyone already has.

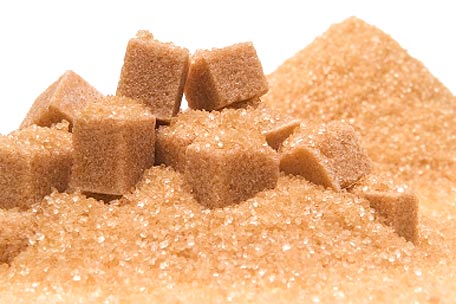
All you need for this is 2 tablespoons of brown sugar and 1/4 cup of milk, organic is best but use what you have. Next just mix the two together and apply to your face, scrub this in circular motions for one to two minutes then let sit on your face for five to ten minutes. After you let it sit on your face rinse it off and wash and tone your face like normal. You can add a tablespoon of olive oil into this if you have dry skin.

Thanks for reading, please leave any request below, and let me know if you try this and how it works for you!

Sunday, October 14, 2012

Avocado Hair Mask

Hey,

This hair mask is very moisturizing and easy to make. All you need is an avocado and either coconut or olive oil.

The first thing you do is peel and pit the avocado, then mash it. Mix in 2 table spoons of oil either coconut or olive and then apply to hair, let this sit in your hair for at least thirty minutes.

This will leave your hair super soft and moisturized. If you have any left over you can apply to your face and let sit for 15 minutes, I would only do this if you have dry skin.

Simple and easy hair or face mask, thats great for the fall weather. Have you tried this before?

Thanks for reading, please leave any request below!

Sunday, September 23, 2012

Fall face mask

Hey,
To start fall off with a good start I decided to share with you a fall themed face mask. This face mask is moisturizing and great for all skin types; it leaves your skin with a gorgeous glow!

Ingredients:
1 tablespoon of Canned or cooked pumpkin
1 teaspoon of Honey
1/2 teaspoon of Milk

To make this into an exfoliater you can add in 1-2 tablespoons of sugar either brown or normal cane sugar. For oily skin you can add 1/2 of cranberry juice.

Mix all the ingredients together then put gently apply to your face, let set for 10-15 minutes. Afterwards rinse off with warm water. If you added the sugar, rub it into your face for around 2 minutes after it has sat on your face for 10-15 minutes, you will have to add a little bit of warm water to make it exfoliater easily, then just rinse off like normal.

Thanks for reading, please leave any request below!

Friday, August 24, 2012

Back to school makeup part 2!

Hey,
Like I said no mascara, and the liner was
more noticeable in person.
You may have seen my last look, you can see that (put in link). As I said in that post light makeup isn't really for me, but I know that's what people like for school so that's what most people do; am I the only one who doesn't enjoy back to school looks since they are too light? Since I don't like to wear light, barely there makeup I decided to do a darker but still very wearable look using all of the same products as the last look! This look is actually more simple then the last one.

Products:
Primer
Coastal Scents Fall Festival palette, you need a skin tone shimmery shade and a matte one(you can use your setting powder), a bronze, and a dark brown, you don't have to use that palette though. The numbers of the shades I used were: # M004 Chamois Nude, # ME017 Light Apricot, and # S030 Cherry Chocolate.
Brown eyeliner
Either a bronze, white, or skin tone eyeliner, I used a bronze one.
Mascara, I actually didn't use any in this look because I didn't feel like putting any on when I was just going to take it off, but normally I would have.

First as always I primed my lids and set that, then I put the bronze shade on my lid and blended it into the crease also. I then took the dark brown shade and blended it into my outer v and half way into my crease. I blended all of the edges and highlighted my brow bone with the matte shade, last for the shadows I highlighted my inner corner with the shimmery skin tone.

Now onto liner I did a line on my upper lash line tapering it inwards; for some reason you can really see it in the pictures but in person it was quite noticeable and dark. I then lined my lower lash line and half of my water line with the shame dark brown liner. I used the bronze liner on the rest of my lash line and water line where the brown wasn't. I set the brown with of course a brown and the bronze with the color I used on my lids. Lastly just apply mascara.

This look is noticeable, but still very wearable. It's good for school, work, the rest of summer, or anytime.

Thanks for reading, please leave any request below!
Links:
Palette I used
Brushes, use code Save2012 for 10% off during August!

Sunday, August 12, 2012

DIY Room Spray

Hey,

Random photo, but I felt it went since we are talking about scents,
and its pretty.

So I hate room sprays you buy at stores, they're either to expensive or they smell terrible, and no matter the price they are always too strong for me. So to meet my standards I made my own; now this isn't mixing scents or anything like that; its very simple and doesn't take long. All you need is some body spray you like, personally I never wear body spray so I have no problem using one that I had, its better if you use a spray that's half gone, that way you're not wasting any of it. Now this is seriously so simple but its perfect cause it gives you a great smell and it's light a fresh, well fresh depending on the spray you use. I got mine at walmart so it was cheap but it still smells good, you can use any scent you like, I used cherry blossom because I like soft and fresh smells, but you can use vanilla or any scents you like. All you do is take a half full body spray that the lid twist off and fill it up, only put a half of the amount of water so its 3/4 the way filled the first time and if its still to strong fill it up the rest of the way, I only filled mine up 3/4 the way, but if your using a strong smell you may want to go a little more. This is great because its cheaper and I'm sure most everyone has a body spray they love but never use anymore or never did, you can also still use this and do this to body sprays you love but are just too strong. I find this last the same amount of time it would on your body or as a room spray but doesn't have that strong barely able to breath quality to it room sprays tend to have.

Thanks for reading, please leave any request down below!