Showing posts with label DIY. Show all posts

Wednesday, June 12, 2013

Coffee Scrub

Hey,
I love coffee, its great for your body and skin. For this scrub I mix about two tablespoons of coffee with enough olive oil to make a paste, I then add half a teaspoon of both cinnamon and nutmeg to help with acne. You want to use ground coffee, instant will work but not as well. The nutmeg and cinnamon are optional. I then massage this onto my clean face for a minute then I let it sit for between 5-10 minutes then I rinse it off with warm water and go on with my skin care routine. This scrub helps with acne, is brightening and hydrating, and with all the sun exposure you get during the summer hydrating scrubs and masks are a must!

Have you ever used coffee as a mask or scrub?

Thanks for reading, please leave any request below!

Sunday, March 24, 2013

DIY Sea Salt Spray

Hey,

So it has been quite some time since I last made a post, this is actually the first of the year, not that good. I have been super busy lately balancing school, boyfriend, friends, and sleep I just haven't really had much time for the Internet at all. But today I had lots of time and I should have more time now then I have been having, since I had time I wanted to share a DIY sea salt spray with you. I personally love messy beach hair, and it is great for the summer and spring, although I rock this all year round.

All you need for this is sea salt and water, I add in conditioner and gel to make it better for my hair and to help hold the waves. Your also going to need some sort of spray bottle.

I add a tablespoon or two of the salt into a cup of water, I use hot water so it dissolves faster but cold works too. Then I add about a tablespoon of both the conditioner and hair gel. I mix this altogether then pour it into my spray bottle. I use this all up in about two weeks to a month, so I really don't know how long this would last but I would say to make a new one monthly.

To use this I just spray it in my hair, sometimes I dampen m hair first, this helps a bit better but I don't always do this then I scrunch up my hair. After that I use the Garnier Surf texturizing paste and scrunch my hair a bit more. After that I hairspray my hair a decent bit and scrunch even more, this doesn't give you a scrunched look it just helps form the waves. Also if you sleep with your hair in braids come morning it will give you even better waves. 

 I hope this helps you out, I have only tried a few from the drugstore before and find this works just the same if not better. If your not feeling making your own the Not Your Mothers Beach Babe is my favorite drugstore one and its pretty cheap.

Thanks for reading, please leave any request below, more post to come!

Monday, November 12, 2012

Tips for at home hair dying

Hey,

I have been dying my hair for a few years now and a few tips I wanted to share. First I do want to say if you are dying your hair more then three shades lighter or darker go to a salon, you never want to go from black hair to blond, it is to easy to mess up and not worth it if you do.

So the first tip I have is to get some one else to dye your hair for you. I always have my sister dye my hair, but anyone would work, don't have some one who has no clue what to do dye your hair though. It's easier for people to get your whole head and not miss any spots then it is for you. These can also help with mess, both down your neck and face or house. If you can't get some one else to do or even if you can, dye it in sections, four usually works best.

Always have one more box of dye then you think you're going to need. It is always best to be safe and have an extra then to be short one, plus you'll have another for next time you dye your hair.

Before you even get to dying you should test it on either behind your ear or wrist, not going to lie this isn't something I do, I have been using the same dye for quite sometime and have never had a problem and I can never remember to do this, but it is something I do recommend doing especially if it's a dye you've never used before, I would wait an hour and if it doesn't react then I would say you should be fine.

Dye your hair when it's two or three days dirty, dirty hair holds better. I have always been told this by my mom, who is a licensed cosmetologist. Whither you are dying your hair or just adding a chemical treatment of some sort, do it on dirty hair.

Vaseline around the hair line, down the neck and on the ears; don't get this in your hair. This will keep the dye from staining your skin.

Using a hair dryer on your hair while the dye is in it will open the hair cuticle, allowing the dye to really get into it. Personally this isn't something I do unless my hair isn't dying.

So now that you've dyed your hair and are done with that, I recommend going a week without heat products. Dying your hair does some damage and its always nice to give your hair a heat free week after dying to prevent even more damage.

My last tip would be do a deep treatment in seven days, I always wait a week, I honestly don't know why I just do. By now all the dye that didn't get rinsed out should definitely be and the dye should be locked into the cuticle. Also wash your hair every two to three days, this is overall better for your hair but also helps prevent it from fading so fast. If your new to skipping washes you can check my post on dry shampoos out here.

Thanks for reading, please leave any request below!

Any other tips, leave them below!

Monday, November 5, 2012

At home cuticle oils

Hey,

My cuticles are always dry and personally I can never remember to buy cuticle oil nor find it something I want to spend very much money on. These are a few alternatives I use that I and have heard of through others.

Lip balm, you would be surprised of the uses you can get out of lip balm, I find that the Vaseline and Carmex lip balms in the squeeze tubes work best. I just squeeze a little out, you need the tiniest amount, and just massage this into my cuticles. You could use just petroleum jelly without the chemicals, it doesn't make a difference, I just personally use the lip balm.

Oils, coconut, olive, hemp, vitamin E, and tea tree, these types of oils are great alone or mixed together, I have dry hands so I like to exfoliate with these types of oils and the rinse of just the sugar or salt and leave the oil on my hands and cuticles and put on a thick layer of lotion and a pair of gloves, I sleep with this and find that not only my hands but my cuticles are moisturized once I wake up. This is good to do once a week, depending on how dry your hands and cuticles are. I don't think I could have said and anymore in that last sentence.

The way that works best for me is applying these such things to my hands after I get out of the shower, but you could just soak your fingers in warm water for five minutes. The reason you want to soak them first is the oil or petroleum jelly will lock in the moisture that is added from the water and keep your cuticles softer longer, it will also do more overall for your cuticles this way.

I hope this helps! Do you have any other things you use to keep your cuticles moisturized or a great cheap cuticle oil?

Thanks for reading, please leave any request below!

Sunday, October 28, 2012

Apple Face Mask

Hey,

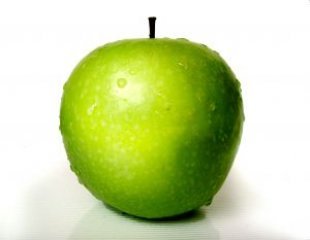
I love apples and they are everywhere during fall and they make great face masks too! All you need is two things for this face mask, one large apple and honey.
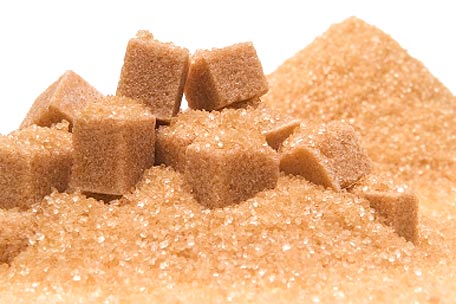
The first thing you need to do is peel the apple and remove the cores and seeds. After that you blend the apple and mix in 2 tablespoons of honey. Once everything is well mixed you cover this and store it in the fridge for 10 minutes, then you apply to your face and let sit for 15 minutes afterwards you rinse off and wash/tone/moisturize your face like normal. If this causes irritation remove it immediately.

This face makes not only has vitamins that are good for your skin but can help prevent wrinkles, dulling skin, shrink pores, and gently exfoliate.

Have you tried this mask? If you try this please share with me how it worked for you!

Thanks for reading, please leave any request below!

Sunday, October 21, 2012

Brown sugar face mask/scrub

Hey,

This face mask is one that I have been doing for quite some time and saw in a magazine years ago, I want to say it was Seventeen but I could be wrong. This is such a simple face mask/scrub; it only requires two ingredients and only take fifteen minutes from start to finish. This really helps with acne and gives you soft skin, and these are things almost everyone already has.

All you need for this is 2 tablespoons of brown sugar and 1/4 cup of milk, organic is best but use what you have. Next just mix the two together and apply to your face, scrub this in circular motions for one to two minutes then let sit on your face for five to ten minutes. After you let it sit on your face rinse it off and wash and tone your face like normal. You can add a tablespoon of olive oil into this if you have dry skin.

Thanks for reading, please leave any request below, and let me know if you try this and how it works for you!

Sunday, October 14, 2012

Avocado Hair Mask

Hey,

This hair mask is very moisturizing and easy to make. All you need is an avocado and either coconut or olive oil.

The first thing you do is peel and pit the avocado, then mash it. Mix in 2 table spoons of oil either coconut or olive and then apply to hair, let this sit in your hair for at least thirty minutes.

This will leave your hair super soft and moisturized. If you have any left over you can apply to your face and let sit for 15 minutes, I would only do this if you have dry skin.

Simple and easy hair or face mask, thats great for the fall weather. Have you tried this before?

Thanks for reading, please leave any request below!

Sunday, October 7, 2012

DIY Pore strips

Hey,
This week I wanted to share DIY pore strips with you, I have seen so many different ways of doing this and figured I would share a few of them with you.

This first one is using glue, I'm sure if you have ever looked up DIY pore strips you've seen this method. What you do is apply glue, I use non-toxic Elmer's school glue, you just apply a thin layer of the glue around your nose and any where else you have pores you'd like to clean out. After you apply it to your face let it dry, this usely takes no more then five minutes but can take up to ten depending on how thick you applied it. Once its dry you slowly and carefully pull it off.

For this one you need an egg and tissue paper; your going to want to separate the egg yolk and egg white. Save the egg yolk, it can be used afterwards or in your hair to add some extra moisture. All you do for this one is beat the egg white till its a bit frothy or has bubbles then you apply it like you apply the glue then you place a pre-cut piece of tissue paper on top of the egg, you could do this with the glue but it peels off better on its own then the egg does. Just like the glue you place it where you feel needs to be cleaned out and then you let it dry this does take a bit longer then the glue, and once its dry you carefully and slowly pull it off.

The last one I wanted to share with you uses gelatin, I personally have never tried this one but have heard great things about it. You need 1 tablespoon of plain gelatin and 1 tablespoons of milk, mix it, it will be chunky then you microwave it for 10 to 15 seconds, let it cool down so you don't burn yourself. This one applies just like the glue, you do the same method of removal, but this one may take the longest to dry.

After you do this make sure you apply a toner, using an ice cube and going over your pores to close them is another good thing to do after doing one of these.

Thanks for reading, please leave any request below!

Wednesday, September 12, 2012

Rue 21 Perfumes

This one is my favorite.
Hey,

I wanted to talk about these perfumes with you, I figured I would just make a review out of it. I'm not going to even go into scents because that is such a hard thing to suggest to someone or review since we are all different with scents. I know I usually review makeup but I really do love these and want to share my thoughts with you.

I love these perfumes, the only thing about they're scents I'm going to say is they all come off to me as sweet, but I really do like them. These perfumes are only sold at Rue 21 stores and outlets, they are 10usd, they only come in one size; which is 1.7oz. These last so long though, not just the bottle but on you. They remind me of the Escada perfumes, since they so sweet, but from what I've been told those fade away really fast. Honestly these last on me all day, they have qualities of a high end perfume and they are only ten dollars.

These are really great for people who like perfume over body splash, want something that's going to last all day, and that's cheap. I honestly recommend these to everyone, they aren't a sophisticated scent or a mature scent but they are really great for the price and they have really cute packaging, it doesn't look as nice as high end perfumes but its is cute and not extremely cheap looking. I really do suggest everyone to just smell them at least. These are also good for teenagers who want a good selection of perfumes but can't afford to buy a lot of high end perfumes, they would make good gifts for teens too. I will say these are more for people around 14-24, but anyone could wear them they just have a teenager/ young adult quality.

The only down fall of them in my opinion is that you can only get these at Rue 21, but other then that they are great, and affordable.  

Have you tried these before, do you like them, and what ones have you tried?

Thanks for reading, please leave any request below!

Rue 21, they seem to have gotten rid of a few, but are always coming out with new ones.

Sunday, September 9, 2012

Dry Shampoo

Hey,

I use the Suave Dry Shampoo but sometimes I run out of it and have to improvise. So these are a few of the things I do to take the place of dry shampoo, you could do these all the time instead of just every once in a while instead of using a dry shampoo. I find these tend dry my scalp out if I use them always instead of dry shampoo.

Baby powder/talc powder; this can sometimes leave a white look around but usually it doesn't and I have pretty dark hair and this doesn't leave a white look around, as long as I really work it in to my hair. I suggest trying to get one that isn't made with talc but it will be fine if you use a talc based baby powder.

This one is for brown hair, coco powder; you don't want this to have sugar at all, you use the baking kind. This blends very well into brown hair, but I wouldn't use this on dark brown hair or black.

Baking powder or soda; this works just like the baby powder.

Corn starch; I would say to not use this for brown hair or black hair, but this would be good for blond hair.

You can use a bit of hair spray where you put the powders to give the volume that a dry shampoo would give you. This also doesn't have alcohol in it so its not as drying to your hair and scalp, I will say that I wash my hair every other day so this doesn't dry my scalp out unless I go more then two day, I hope that makes sense.

Do you know of any other substitutes for dry shampoo?

Thanks for reading, please leave any request down below!

Sunday, September 2, 2012

DIY Hair Detangler

Hey,
So I was have extremely tangley hair, I was looking for a DIY hair detangler I could make and then share with you. I can never seem to find any that aren't for kids, too overpriced and that work. I'm not opposed to buying detangler made for kids but I find they don't work or I can't get past their scent, and some even way my hair down. So I went on a search for a DIY hair detangler, the one I found and am going to share with you is so simple and could double as a leave in condition.

What you need:
Spray bottle, you want a small bottle
Conditioner, your favorite scented one or whatever one you have, I used a Herbal Essence one
Water, not tap, either distilled or hot water

All you do is take you spray bottle fill it up about 3/4 the way then add in about an 1/8 of a cup of conditioner, this will vary on the size of your bottle but you want it to be a small bottle and use around one cup of water. After everything is in the bottle just shake it up, once the cap is on of course! This not only is cheap, uses stuff you already have but you can make its not limited to a scent.

How I use it is, after I towel dry my hair I spray a good bit in mainly at the ends. After its mostly dry I just brush my hair out with a paddle brush or a wide tooth comb and my hair is less tangled and it makes my hair softer.

Whats that not so simple, and if you try it I'm sure you'll agree much better then the ones you get at the store!

Thanks for reading, please leave any request below! Are there any face mask you've heard of or a specific problem either hair, nails, or skin, you'd like a DIY mask or treatment for?

Sunday, August 26, 2012

How to cure Eye Puffiness

Hey,

So this is just for everyone but also goes along with the back to school theme. I know I only get six hours of sleep usually during the school year. With the lesser amount of sleep my hereditary dark circles get worse and my eyes tend to be puffy in the morning. I figured I would share things that help with that and that can be done quickly in the morning.

First thing you can make are green tea/chamomile tea ice cubes. You can do one or mix them together, what you do to make these is take a bag of each or two of the same and steep them in boiled water for about three minutes, after you do that you want to pour them into an ice tray, I like to stick toothpicks in them but that's optional. The great thing about these is that you can also chill the tea bags and use those, I will say the ice cubes can be a bit messy. Chamomile tea is a natural anti-inflammatory so it helps decrease puffiness. The caffeine in green tea does the same thing, and they are both very soothing to your eye. If you want soothing that's not going to make as much of a mess, this still gets makes a little mess though, you can soak cotton balls in the tea and freeze those, I would squeeze them out before freezing.

Another thing you can do is take two spoons and freeze them over night. I find this doesn't stay as cold as much as the ice cubes do.

You can also freeze or chill cucumber slices, these are very soothing to your eye area and gentle. Cucumber is quite popular for soothing the skin and eye area. You could juice the cucumber if you have a juicer and make ice cubes out of that too.

I hope these helps, feel free to leave any of your tips for eye puffiness in a comment. There are other things you can do, but I only wanted to share the things that don't take more then five to ten minutes and were things you can easily wipe off and it not be a big deal to do in the morning before school or work.

Thanks for reading, please leave any request below!

Sunday, August 19, 2012

Super Soft Feet for the Rest of Summer

Hey,

I know summer is coming to an end but its not to late to get super soft feet. This is also good for all year, I actually do this throughout the whole year. This also works on your hands too, I get terribly dry hands in the winter and this is one of the few things that help my. 

So what I do is I scrub my feet using this, I use salt instead of sugar on my feet and usually hands, but you can use either depending on how sensitive your skin is or how rough. After that I rinse off all the salt and then I apply a thick amount of lotion all over my feet and then put on socks, you can use lotion designed for feet or unscented lotion, but try to find a thick lotion, it works better.I do this before bed, that way they are super soft in the morning. I will say that this doesn't work the first time fully if your feet are really rough. I typically do this once a week, on Sundays to be exact.

I will also point out that if you do this after painting your nails, make sure they are fully dry, but if you got some on your skin this takes it off really easily.

Have you tried this before, does it work for you, are you going to try it.

Thanks for reading, please leave any request down below!

Sunday, August 12, 2012

DIY Room Spray

Hey,

Random photo, but I felt it went since we are talking about scents,
and its pretty.

So I hate room sprays you buy at stores, they're either to expensive or they smell terrible, and no matter the price they are always too strong for me. So to meet my standards I made my own; now this isn't mixing scents or anything like that; its very simple and doesn't take long. All you need is some body spray you like, personally I never wear body spray so I have no problem using one that I had, its better if you use a spray that's half gone, that way you're not wasting any of it. Now this is seriously so simple but its perfect cause it gives you a great smell and it's light a fresh, well fresh depending on the spray you use. I got mine at walmart so it was cheap but it still smells good, you can use any scent you like, I used cherry blossom because I like soft and fresh smells, but you can use vanilla or any scents you like. All you do is take a half full body spray that the lid twist off and fill it up, only put a half of the amount of water so its 3/4 the way filled the first time and if its still to strong fill it up the rest of the way, I only filled mine up 3/4 the way, but if your using a strong smell you may want to go a little more. This is great because its cheaper and I'm sure most everyone has a body spray they love but never use anymore or never did, you can also still use this and do this to body sprays you love but are just too strong. I find this last the same amount of time it would on your body or as a room spray but doesn't have that strong barely able to breath quality to it room sprays tend to have.

Thanks for reading, please leave any request down below!