Showing posts with label brown. Show all posts

Friday, June 21, 2013

Bronze Slutry Eyes

Hey,

This look is easy and so pretty for a night out this summer. It is using one palette and just a few other products. The palette used for this look was the Ooh La Lace palette by Lorac, it is a great palette for both day and night looks, it comes with six baked shadows, enough about the palette, but if you would like to know more about it I have a review on it which you can see here.
 
What I used:
  • Urban Decay Primer Potion in Eden
  • Lorac Ooh La Lace palette, all shades excepts the gray
  • Rimmel Scandal Eyes Kohl Liner in Brown
  • Avon Glimmersticks Diamonds in Flashy Copper
  • ELF Liquid Eyeliner in Black
  • Random unknown mascara
What I did:

  1. Primed my eyes with UD Primer Potion, I set this with my face powder
  2. Lined my eyes with the brown liner and put a little in the outer v, I then blended this out with my finger.
  3. I packed the brown from the palette over the liner then blended it out into the crease. I also smoked it out on my lash line.
  4. I added more brown to the outer v and crease till it was as dark as I wanted.
  5. I dabbed my brush very lightly into the black then blended this into my outer v, just the littlest black, I didn't want it to look like there was any black but just darken up the outer v without using any other palettes or single shadows.
  6. I patted on the bronze shade to my lid and blended the edges, I also took this slightly into the inner part of my crease.
  7. I highlighted under my brow and made sure all edges were blended out with the lightest shade in the palette.
  8. I lined my lower lash line, tight and water line with the brown liner, leaving the inner corner and very inner third clean. I lined the inner third with the copper liner.  
  9. I set all the liners with coordinating colors and blended the brown liner out.
  10. I lined my top lash line with the liquid liner and applied a few coats of mascara.
  11. Lastly I cleaned up the edges, applied concealer, and did my eyebrows.
Thanks for reading, please leave any request below!

Wednesday, June 19, 2013

How I Do My Eyebrows


Hey,
Before
After
Everyone seems to have a different way of doing their eyebrows, some complicated some very simple. This is just what I typically do, sometimes I do use powder instead.
My brows are naturally good, so there's not to big of a difference nor do I have to do much to them. But there is a pretty noticeable difference in person.
 
What I use:
  • Avon Perfect Brow Pencil in Dark
  • Rimmel Professional Brow Pencil in 002 Hazel
  • ELF Clear Mascara and Brow Gel
What I do:
  1. The first thing I do is pluck all the random hairs and make sure that my brows are in the shape I want them.
  2. I use the Avon pencil which is darker then the Rimmel pencil, I only use this to fill in my arch.
  3. Then I lightly do the beginning of my brows. 
  4. I pencil in the ends darker then the beginning of my brows but not as dark ad the arch.
  5. I use a spoolie and run this throw my brows to blend it all together.
  6. Lastly I set my brow with a clear gel. I didn't set my brows in the picture but normally I do.
I don't believe the Avon pencil is still available but if so or you can find it give it a try, its a great brow pencil, and I wouldn't recommend the Rimmel one, personally I am just using it up, it is very dry and just not the best pencil out there, you can get better for less. I have heard good things about the Wet n Wild Color Icon pencils for the brows.
 
 
What is your brow routine?
 

Thanks for reading, please leave any request below!
 

Friday, June 14, 2013

Neutral Cut Crease

Sorry for the messy mascara on the lower
lash line, this is a normal part of my daily
makeup, mascara in places it doesn't belong!
Hey,

This week I was really feeling the neutrals, but I did want to try something different. I went with a wearable cut crease look that is great for day time. I used a total of seven different products to create this look.

What I used:
  • Rimmel Scandal Eye Eyeliners in Brown and Nude
  • Maybelline Single in Made for Mocha
  • Urban Decay Naked Basics palette, I used W.O.S., Faint, Naked 2, Foxy, and Venus
  • ELF Liquid Liner
  • Random mascara, sorry I really don't remember the name of it

First I cut the crease, through my crease I just drew a line with the brown eyeliner. I did this as neatly as possibly. You really just want to outline your crease. I then blended that out with the Maybelline single, which is a dark brown. I continued to blend my crease out with Faint and then over that mainly around the edges I used Naked 2. I then highlighted under my brown with foxy. After I finished the crease I used the nude liner as a base on my lid and inner corner, I used W.O.S. over that and Venus as my inner corner highlight. Using the brown liner again I smudged this along my lash line and then blended it out again with the Maybelline single for a more smokey look. I went over the edges of that with W.O.S. to blend it out as much as possible. I then lined my lower lash line and waterline and tight line, except for the inner corner. I set this along with blending it out with yet again that Maybelline single. I did a thin line of liquid liner on my top lid and then a quick coat of mascara on both top and bottom lashes.

Side note if you see this single I really suggest it, its pigmented and a great cheap single that I find is great for darkening up any look!


Do you rock the cut crease?

Thanks for reading, please leave any request below!

Sunday, October 21, 2012

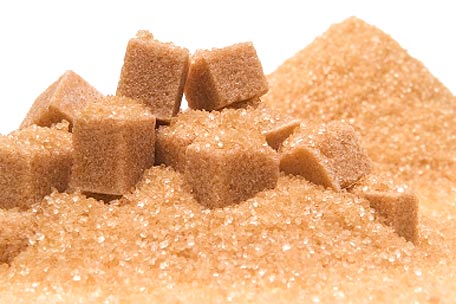
Brown sugar face mask/scrub

Hey,

This face mask is one that I have been doing for quite some time and saw in a magazine years ago, I want to say it was Seventeen but I could be wrong. This is such a simple face mask/scrub; it only requires two ingredients and only take fifteen minutes from start to finish. This really helps with acne and gives you soft skin, and these are things almost everyone already has.

All you need for this is 2 tablespoons of brown sugar and 1/4 cup of milk, organic is best but use what you have. Next just mix the two together and apply to your face, scrub this in circular motions for one to two minutes then let sit on your face for five to ten minutes. After you let it sit on your face rinse it off and wash and tone your face like normal. You can add a tablespoon of olive oil into this if you have dry skin.

Thanks for reading, please leave any request below, and let me know if you try this and how it works for you!

Tuesday, September 25, 2012

NOTD: Vintage Boutique

Hey,
Yet again another late nail post, I wanted something fall, I love fall I feel like everyone who is into beauty and fashion says that but it has always been my favorite season. Last week I mentioned that I may be done with these and I still am unsure if this will be the last one or not, I will definitely replace these post with something else for Mondays. So this week I chose to use Vintage Boutique, its a gorgeous fall color, I'm not always the biggest fan of brown but there is something about this brown that I just love, it reminds me of fall and hot chocolate, which I do categorize as a fall item. I don't know how to even begin to explain this brown, it seems to me like it has purple in it and at the same time it seems like it doesn't and is more of a taupe or mushroom brown. It's an Avon polish, part of their Nailwear pro+ nail enamel line, and I do believe this is only sold around now, but I may be wrong about that.

My blog is being part of a "competition", I would really appreciate if you would vote for me, its under the best new blogger category. It's a really great way to find some awesome blogs too. http://www.theblogcat.com/p/blog-cat-awards.html

Thanks for reading, please leave any request below!

Nail polish: http://shop.avon.com/shop/product.aspx?level1_id=300&level2_id=301&pdept_id=313&cat_type=C&pf_id=45832

Friday, August 10, 2012

My go to smokey eye, daytime smokey eye!

Hey,
Sorry about the blurry lashes...
Some may disagree with me as to whither this is daytime appropriate but for me it is. This look is perfect for photography since its all matte; its actually the look I did for my Senior picture. It's a nice warm tone matte smokey eye, I personally would wear this to school, work, weddings, out, parties, and anywhere else. This is so simple and easy, it  takes under ten minutes to do but looks great! I also need to note this is darker in person then it photographs, I promise its dark smokey eye, but it doesn't want to come out the color it looks in person.

Products used:
Urban Decay Primer Potion
Made for Mocha by Maybelline, you can alter any of these products and use whatever you have. This was really cheap like under three dollars. This is just a dark warm brown.
I used the Coastal Scents 42 double stack matte palette, I used the white, black, and mid tone brown in the top right corner, you can check that out here and see all of the colors.
Black eyeliner
Maybelline Falsies mascara, expect to see this in this months favorites!


If you got the Urban Decay Smokey palette you can use that, it honestly would be perfect for this, but I'm not sure if those are mattes or not.

So the first thing I did as always was prime my eyes then set it with my face powder.

Next I used the mid tone brown shade, you can even use your bronzer for this I just prefer the way a mid tone brown looks over my bronzer, I blended this in my crease. After that I started packing on the dark brown shadow on my lid from the outer v and lash line into the rest of my eyelid. Then I blended it, this blends out very easily since we already put the crease color down, you just want to blend this into the shape you want.


Then I used an angled brush and black eyeshadow and made a line on my upper lash line then used a pencil brush to blend it, then I blended the dark brown shadow on my lower lash line. I then rimmed my eyes and set that.
My eyebrows really need done, sorry about that.

Lastly I lightly high lighted under my brow which blended out even more, and inner corner with the white and applied mascara.

Was that not so easy, it takes no time and my cat is playing with a roll of pennies I found in my room last week, she's so strange. This is a great smokey eye for the day or night and just looks gorgeous and sexy. You can use black over brown if you'd prefer. If you do use black you can use either the mid tone brown or gray either way looks good. You can also use shimmery shade if you'd prefer, usually I use a shimmery highlight, but keep in mind if you use this for photography keep it matte. 

Thanks for reading, please leave any request down below!

Products links:
Primer
Single eyeshadow
42 double stack matte palette
Mascara, I think I'm going to review this in a few weeks and do a before and after picture.
Brushes, use SAVE2012 for 10% off during August and you get a free travel size eyeliner brush if you spend upwards of 30usd.